BUS Seed Load: Difference between revisions
From SWCP Support Wiki
Jump to navigationJump to search
No edit summary |
No edit summary |
||
| Line 16: | Line 16: | ||
==Creating a Seed Load== | ==Creating a Seed Load== | ||
# First, create a backup set as described in [[BUS Creating a Backup Set]] | # First, create a backup set as described in [[BUS Creating a Backup Set|this guide]] | ||
# In the BUS Client main menu, click on the Backup Sets menu <br />[[File:Bus_backup_set_icon.jpg|200px]]<br/> and select your backup set. | # In the BUS Client main menu, click on the Backup Sets menu <br />[[File:Bus_backup_set_icon.jpg|200px]]<br/> and select your backup set. | ||
# In the Backup Schedule menu, schedule to "off" if there's a schedule enabled. You can turn it back on after we have completed the seed load. | # In the Backup Schedule menu, schedule to "off" if there's a schedule enabled. You can turn it back on after we have completed the seed load. | ||
Revision as of 14:26, 20 August 2019
Seed Loads
A "Seed Load" lets you back up your files to a USB hard drive, then send us the drive to load the data on the server. We send you a USB hard drive, you do the initial backup to the drive, then send it back to us. This is recommended for getting started if your backup set is larger than 10-15 GB.
- One FREE seed load offered per account (not including shipping charges, if applicable).
- $35 each for additional seed loads, plus shipping.
- Shipping waived if customer picks up/drops off disk or computer.
- Customer will be charged $150 for the hard drive if it is not returned within 2 weeks.
- Customer may bring computer to SWCP's office and we will perform the seed load here. Turnaround time: 24 hours.
Seed Restore
- Just like a seed load, but in reverse. If your computer fails and your backup set is very large, we can copy your files to a hard drive and mail it to you.
- One FREE seed restore per account (not including shipping charges, if applicable).
- Pricing and conditions same as above for seed loads.
Creating a Seed Load
- First, create a backup set as described in this guide
- In the BUS Client main menu, click on the Backup Sets menu
and select your backup set. - In the Backup Schedule menu, schedule to "off" if there's a schedule enabled. You can turn it back on after we have completed the seed load.
- In the Destination menu, click "Add" and add your external hard drive / thumb drive if you haven't done so already
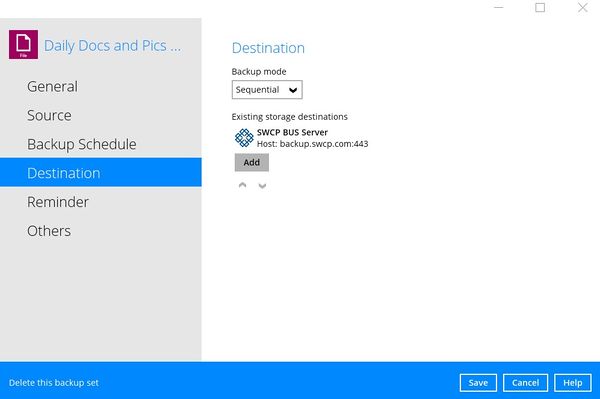
- Click "Save"
- In the main menu, click "Backup"
- Select your backup set, and click "Next"
- In the Choose Your Backup Options menu, click "Show Advanced Options"
- Set the In-File Delta type to "Full", uncheck "SWCP BUS Server" from the destinations list. Leave "Run Retention Policy after Backup" unchecked.
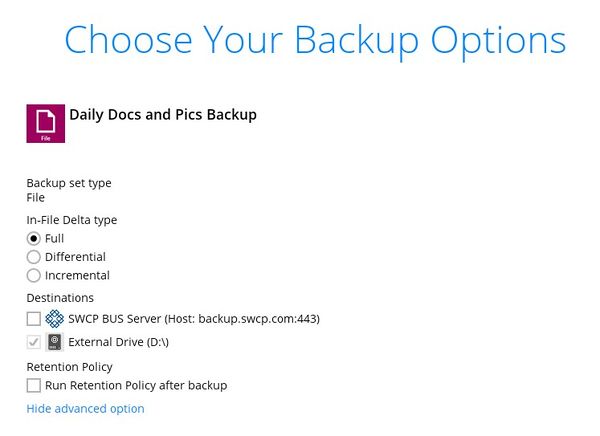
- Click "Backup"
- Once the backup job is completed, bring the external hard drive to our office and we will copy it to our server.


