BUS Restore: Difference between revisions
From SWCP Support Wiki
Jump to navigationJump to search
Created page with "# If the BUS Client is not installed, use this installation guide first to install the software. If you are restoring to a new system that yo..." |
No edit summary |
||
| Line 1: | Line 1: | ||
# If the BUS Client is not installed, use this [[BUS Installing SWCP BUS Client | installation guide]] first to install the software. If you are restoring to a new system that you do not plan to backup, install the Restore Client | # If the BUS Client is not installed, use this [[BUS Installing SWCP BUS Client | installation guide]] first to install the software. | ||
#*If you are restoring to a new system that you do not plan to backup, install the Restore Client<br/> | |||
#* To restore from a local copy of data on a new system, see our [[BUS Seed Restore|seed restore guide]]<br/> | |||
# Launch the BUS Client and login with your BUS username and password<br/> | # Launch the BUS Client and login with your BUS username and password<br/> | ||
# Click the Restore icon in the main menu<br/>[[File:Bus_restore_icon.jpg|200px]]<br/> | # Click the Restore icon in the main menu<br/>[[File:Bus_restore_icon.jpg|200px]]<br/> | ||
Latest revision as of 13:43, 20 August 2019
- If the BUS Client is not installed, use this installation guide first to install the software.
- If you are restoring to a new system that you do not plan to backup, install the Restore Client
- To restore from a local copy of data on a new system, see our seed restore guide
- If you are restoring to a new system that you do not plan to backup, install the Restore Client
- Launch the BUS Client and login with your BUS username and password
- Click the Restore icon in the main menu
- Select the destination to restore from in the next menu. This can be our server (SWCP BUS Server) or a local drive if you are also performing local backups.
- Choose files to restore:
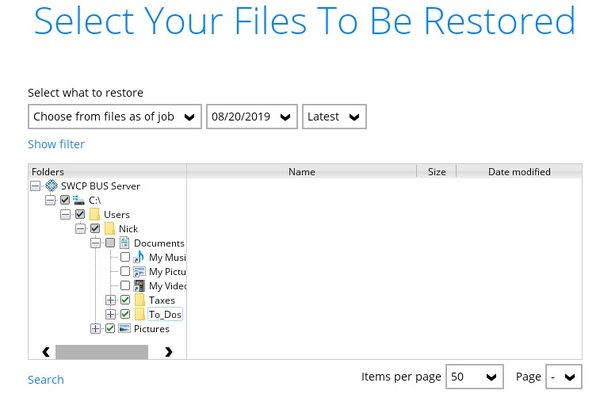
- Using the folder pane on the left, check the files and folders that you want to restore. Leave everything checked to restore the entire set.
- You can search for files matching a particular pattern (*.jpg, for example) using the Search option in the lower left.
- If you want to restore an earlier version of a file from a previous backup job, you can select a particular date and time using the pulldown menus above the folder/file list. Your backup set's retention settings determines how far back you can restore deleted files.
- Using the folder pane on the left, check the files and folders that you want to restore. Leave everything checked to restore the entire set.
- Choose where to restore the files:
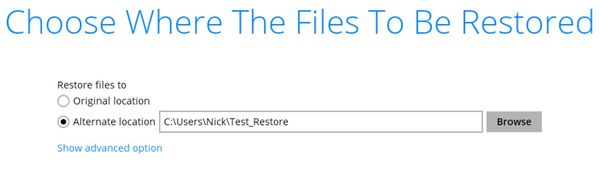
- You can restore the files to their original location, or choose "Alternate location" and click the Browse button to select an different folder to restore to.
- To show additional restore parameters, click "Show Advanced Option" (the defaults are ok in most cases)
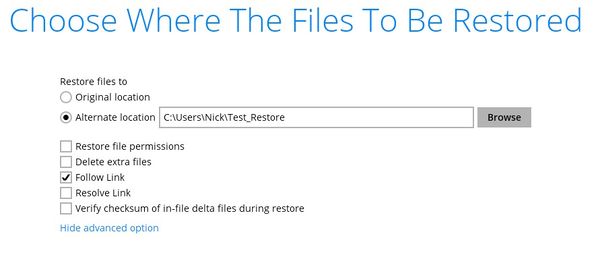
- You can restore the files to their original location, or choose "Alternate location" and click the Browse button to select an different folder to restore to.
- Select a temp directory:
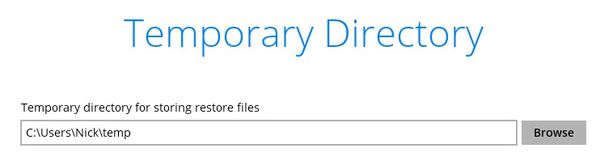
- The BUS Client uses a temporary directory to stream and merge incremental backups during the restore. By default it will choose something like C:\Users\your_username\temp. Using the default is generally ok, but if you are restoring any massive individual files (like a 1TB database, for example), be sure that you have enough room on the drive the temporary folder lives on. For example if you have a 1TB database file a possible 500GB worth of incrementals to merge, you'll want at least 1.5GB free.
- The BUS Client uses a temporary directory to stream and merge incremental backups during the restore. By default it will choose something like C:\Users\your_username\temp. Using the default is generally ok, but if you are restoring any massive individual files (like a 1TB database, for example), be sure that you have enough room on the drive the temporary folder lives on. For example if you have a 1TB database file a possible 500GB worth of incrementals to merge, you'll want at least 1.5GB free.
- Click "Restore"


